Category Archives: Unofficial Scenario

Scenario Review – Battle of Gela

Battle of Gela is an Operation Husky scenario for Memoir 44 by jdrommel which focuses on the early stages of the landings in Sicily.  It’s an unusual map because it features an Axis force attacking an Allied force which has already occupied the beaches.  The setup gives the Italian forces a chance, but as in reality, the balance was distinctly in the favor of the Allies.

On the 10th of July 1943, during operation Husky (Allied landing in Sicily), the harbour of Gela was captured by US Rangers units while the 1st US Infantry Division (the Big Red One) landed on the beaches around the city. Axis reacted quickly and Italian general Guzzoni sent at once troops against the US beach head. At 09h00, the Italian Mobile Group “E”, equipped with French R-35 tanks, made a counter-attack against landed troops,followed by infantrymen of the “Livorno” division. The Italian attack was a menace for the US supplies depots created on the landing beaches and in the harbour. The battle was fierce all the day and ended in a street fighting where US Rangers destroyed several Italian tanks with bazookas and grenades. In the same time the fire of the US Navy inflicted heavy losses to the Italian troops in the open ground. The counter-attack failed, Italian troops withdrew. Gela stayed in US Rangers hands.
The stage is set, the battle lines are drawn, and you are in command. The rest is history.

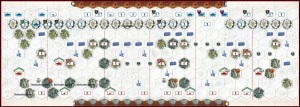
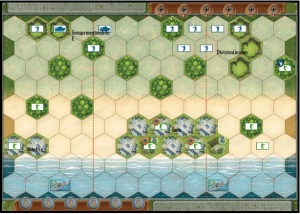
Here’s a screenshot of the map.

Battle of Gela

Note the Rangers holed up in Gela at the bottom, guarding two Axis victory medals.  I think this might be the first time I’ve seen the Italian victory medal placed in an offensive location.

The biggest tactical decision the Allied player will make is, “What do I do with the Rangers?”  The Axis player cannot win without killing one of them, or taking one victory medal, giving the Allied player the option of holding out on the defensive up to the very end.  This can work because of the two destroyers patrolling off the coast.  This gives them long-term firepower superiority which the Axis simply cannot match.

With a strong opening hand, the Axis can make a credible bid to win this battle.  They have the infantry to push forward into the town of Gela, and their two armor units keep the Allies from feeling too confident about charging out of cover.  However, unless things move quickly in their direction, the Axis player is going to start feeling the pain of constant long-range bombardment.  If the Axis do make a push into Gela town, it will be quickly decisive in one direction or the other.  On the other hand, a lucky Barrage by the Axis player in the early turns might knock out a ship, changing the balance of the game entirely.

This is an interesting battle because of how rare it is for the offensive player on a beach map to start on the inland side.  However, from our playtests, it seems like even an excellent Axis opening can only ensure that the battle will be close.  For our first game, my regular opponent (as Axis) opened with two Move Outs and two Infantry Assaults, while I was stuck with a hand full of center cards.  He quickly gained five medals, but found it incredibly difficult to finish me off for the final medal.  The battle quickly turned stupid, as I advanced a Ranger unit into the open to attack his tanks … and killed them both.  His backfield infantry, most of which had used Italian super-retreat to get off the beaches after his initial success, finally won the game.  For our second game, as Axis, I had nothing but probes, and felt lucky to end the battle with three medals.

Overall Evaluation – 3/5 – This is not a bad map, but the fact is that being inevitably destroyed by artillery just isn’t all that fun, and the novelty value wears off quickly.

Balance Evaluation – Allied Favored – DoW Online rates this as 61/39 Axis favored, but fully a third of those games were jdrommel playing himself, and another third were using a mysterious variant on Vassal.  Sure, the Allies can give this away by pushing forward with their Rangers, but why?

First Turn Win Possibility – None – This scenario will be decided late, not early.

Plink-Fest Danger – Moderate – So long as the Axis tanks are intact, the Allied player should keep his units back in cover.  However, an overly cautious Axis player will be mauled by naval fire, conceding the battle before it really gets started.


Scenario Review – Battle of the Bridgehead

Battle of the Bridgehead is an unofficial Normandy scenario for Memoir ’44 by forum poster brumbarr44.  I’ve played a few scenarios by him in the past, and they are usually solid.  This one features a few Canadian units versus the Hitler Youth and a SS panzer-grenadier element.  This is a fairly old scenario, and can be tough for a weak German player, but nevertheless provides an interesting battle for two players who know how to maneuver their tanks.

On D-Day +1 the Canadians sought to achieve their final D-Day objectives and push through to the airfields at Carpiquet.

Elements of the 9th Brigade consisting of the North Nova Scotia Highlanders and armour provided by the Sherbrooke Fusiliers advanced on Buron along the Buron-Authie axis toward Carpiquet. At Authie the Canadians ran into the first major German counter-attack against the allied bridgeheads.

The 12th SS Panzer Division consisted of HitlerJugend. Young, fanatical but inexperienced soldiers. They were however commanded by NCO’s who were hardened veterans of the Eastern campaigns. Among the lead elements was Standartenfurhrer (Colonel) Kurt Meyer and his 25th SS Panzer-Grenadier Regiment. Meyer’s orders were to strike at the beaches, his first task was to recapture Buron and Authie.

The Germans moved quickly on the unwary Canadians who had already lost men just in the taking of the villages. Casualties on both sides mounted as the North Novas proved to be a match for the HitlerJugend. The same cannot be said of the Sherbrooke Fusiliers whose out-gunned Shermans and green crews were not equal to Meyer’s skilled command. Nevertheless, many panzers were left burning on the field as well. Although the 9th Brigade pulled back to entrench the 25th SS was largely eliminated as an effective force.

The next day, elements of the 26th SS Panzer-Grenadier Regiment moved in on the 7th Brigade to the right of the 9th. Storming the beaches on D-Day left the 7th under-strength. The 26th SS although attacking piecemeal were able to force the Winnipeg Rifles into a difficult retreat. The Regina Rifles also found the enemy starting to show up in strength. Were it not for the timely arrival of tanks from the Sherbrooke Fusiliers, disaster would have surely ensued.

Kurt Meyer had out-fought the Canadians and the fierceness of his attack had left them uncommonly wary of tangling with SS units. Carpiquet, virtually in view of the lead Canadian elements, would not be reached for another month. Which was the next time that the Canadians saw major action.

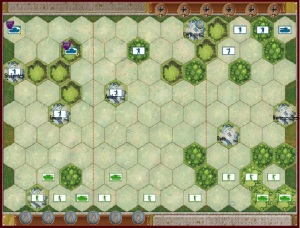
Here’s the setup.

Bridgehead

First off, as this is a rather old scenario, it does not specify the use of Commonwealth Army rules for the Canadian forces in this battle.  I suppose that one could play with them, but that may have odd unintended consequences.  Then again, Stiff Upper Lip isn’t nearly as much of a game changer as is the Gung Ho ability of the US Marines, let alone the Banzai charge of the Japanese Army.

Note the 5 Canadian tanks on the field, to only 3 German tanks.  Combined with the wide open spaces, this gives the Allied player a significant advantage – IF he or she can get those two tanks out of the hedgerows in the right sector.

Also note that the battle is to 5 medals.  By the time the Allied player is closing in on the victory location at Carpiquet, the battle will be mostly over.

The hills and open spaces give both players a lot of room to maneuver around, leading to some interesting tactical decisions.  Infantry combat will fill out the medal rack for both players, but the real meat of this battle is going to be the tank duel.  In my opinion, the German player will need a little bit of tank luck for the battle to go his or her way, given the distinct firepower superiority the Allied player enjoys.  However, with a few lucky rolls the German player just might end up with the last tank on the board, especially if he or she can strike first, knock out an Allied tank right away, and take advantage of the hills for cover.

I rarely have the tank luck, so this isn’t the sort of map that I’ll ever fall in love with, but it’s not a bad map at all.

Overall Evaluation – 3/5 – The combination of open spaces, cover, fortified infantry, and mismatched armor makes for an interesting battle, but the potential for an Allied romp is high enough that I can’t rate this higher.  Less experienced players will also get slaughtered no matter who they play – there’s a lot of finesse to this one.

Balance Evaluation – Allied Favored – 5 tanks to 3 on a mostly open map is a pretty powerful advantage.  Days of Wonder Online has it at 51/49 Allies, which is a much tighter spread that I would expect.

First-Turn Win Possibility – Low – I suppose that if the Germans managed to knock out two Allied tanks on their first turn it might be hard for the Allied player to recover, but the chances of this happening are incredibly low.

Plink-Fest Danger – None – This is an open brawler map, and there is neither the right unit mix nor the right terrain for a plink-fest.


Scenario Review – Red Barricade Factory Complex OVERLORD

Red Barricade Factory Complex, by independent author Winter Storm, is a good Overlord scenario about a classic East Front battle for Memoir ’44.  It takes the classic Red Barricades official scenario as its inspiration, expands the map, and gives the battle a slightly different flavor.  For the sake of balance I suggest a fairly major change to the opening setup, but in general I can recommend this map.

By mid October the fighting amidst the rubble of the Red Barricades Factory Complex in the northern section of Stalingrad had drawn in more and more of the German 6th Army’s forces. On the 22nd the 79th Infantry division, supported by engineers, tanks and artillery, launched an intense attack over the Railroad embankment toward the Barricades Factory.

Under heavy fire from dug-in tanks and Russian snipers, the German troops slowly made ground toward the Factory. The Soviet line finally broke, but by day’s end only a corner of the factory had been taken.

The stage is set, the battle lines are drawn, and you are in command. The rest is history.

The opening setup shows the overwhemling German force massed on the far side of the railroad embankment, facing a dispersed Russian force in good defensive terrain.

Red Barricades OverlordThe Russians can quickly take up to four area control medals, but may find it hard to keep them in the end due to the horrible attrition they are bound to suffer.  The German player is strongest on their left flank, while the Russian player is strongest in the center.  There is no one key engagement on this map.  The battle is to 17 medals, and the Germans are going to need to mount an offensive in every sector to rack up that many kills.

In my opinion, the opening setup makes it too easy for the Germans to use their firepower advantage without fear of retaliation.  Notice the multiple German artillery units in 2-dice range of the Russian frontline.  There is nothing the Russians can do about this, except to abandon their forward positions and retreat.  But if they do, the German player can move his guns up in almost perfect safety.  The German armor advantage means that any attempt to advance on the German guns can be cut down pretty quickly, as the Russian player would have to leave his dug-in positions to advance.  Firing from safety, there’s little reason for the Germans to ever advance, and a brutally slow win via plinkage is entirely possible.

This is why I recommend a change in the opening setup.  Move the Russian guns two spaces forward (don’t put them on the sector line – that’s too brutal – and don’t put them in a town), and dig them in with sandbags.  Now, they’ll be able to fire onto the German baseline.  This will encourage the Germans to move their units up quickly and start the real fight.  This doesn’t put the German player at much of a disadvantage, as they have the quantity and type of units to knock out the Russian front-line defenses, and the flexibility to choose the point of attack.  Moving the artillery up also makes the Russian guns tempting targets, and might lead the German player to make interesting gambles to take them out quickly.

General Evaluation – 4/5 – With a slight alteration, this is a pretty fun map.

Balance Evaluation – Even – With the altered artillery position, it is not likely that the German player will be able to pull off an easy win, even with excellent cards and dice on their side.

First-Turn Win Possibility – None – This should end with a nasty exchange between weakened units not far from the Russian baseline – entirely appropriate for a Stalingrad scenario.

Plink-Fest Danger – Moderate – With the original setup, this would be High, because there is nothing the Russian player can do to force the German player to advance beyond the embankment.  But with the altered setup, the German player will get mauled pretty badly on the baseline by the Russian artillery if he/she does not advance, and once the advance begins, the Russian player is going to have more important things to do than plinking German units on the baseline.

Scenario Review – Battle of Bir Temrad

The Battle of Bir Temrad is part of jdrommel’s epic Desert War series, which is well worth playing in its entirety.  There is none of the lopsided, first-turn-knockout BS that plagues far too many North African scenarios, yet they still feel distinctive and thematically appropriate.  This scenario is tough for the Germans, as the Allies have a distinct force advantage, but the right moves at the right time by German Armor can easily turn the tide.

From 8th of November 1941, general Rommel began the withdrawal of Axis troops on Aïn El Gazala. The British forces involved in Operation Crusader pursued them at a distance. This allowed XXIst Italian army corps to set up a new defense line to protect the withdrawal of the main Axis forces. From 11th to 16th of December 1941, the Polish Rifle Brigade and the 4th Indian Division assaulted the Italian lines while tanks of the Guards Brigade outflanked the defenses by the south to reach Bir Temrad on the rear of Italian troops. But the intervention of XXth Italian army corps (Celere) and a kampfgruppe from Afrikakorps warded off the threat and made 800 prisoners. On the 16th of December, the XXIst Italian corps could withdraw at its turn to Tmimi and Derna.
The stage is set, the battle lines are drawn, and you are in command. The rest is history.

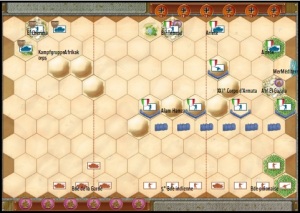
Bir Temrad

Given how wide open the map is, it’s hard to predict with any certainty where the main engagement will take place.  The Italian infantry on the hill line are a tempting target for the Allied armor.  A foolhardy British player will move up with everything in a solid attack, blasting away at the Italian forces and advancing to the line of hills.  Then the Germans will swoop in from the flanks, eliminate the Allied armor, and carry the day.  At least, that is one possibility.  Desert maps being wide open and all, this whole map will be determined by where the Allies attack first, and whether or not the Germans have a good card in their hand to counter.

My playthrough of this map was incredibly silly.  As Allies, I had some of the worst dice I’ve seen, comically bad, and could not hit anything – despite having an incredible hand.  The German player, however, had no cards on his right flank at all, and was only able to activate his German armor by countering my general advance.  The resulting tank battle initially swung in his favor, as my bad dice continued, but was ultimately decided by his hand, which did not allow him to fire back.  I cleaned up from that point on.

General Evaluation – 4/5 – There are lots of decisions to make on both sides, and neither side has an overwhelming advantage in force or position.

Balance Evaluation – British favored.  DoW has it at 69/31 Allies, which sounds about right.

First Turn Win Possibility – None.  Any major engagement requires movement and commitment from both sides on this map.

Plink-Fest Danger – Mild.  A cautious Allied player can sit near his baseline, and blast away at the Italian infantry with artillery and tanks.  However, this strategy could be largely negated by pulling back behind the hill line.  Further, the strong Axis armor contingent can quickly advance on the Allied forces – if the Allied tanks are caught near the baseline, it’s not likely to go well for them.